
I’ve been reading e-books for several years now, but it wasn’t until I started trying to format my own manuscript as an e-book that I truly learned the differences between print and digital versions. This may seem obvious to people familiar with designing e-books and websites—but to the average reader or writer, it’s a bit mysterious.
The biggest difference is that an e-book document has no fixed pages; instead it flows like one continuous document, much like this blog. (Also kind of like Jack Kerouac’s manuscript for On the Road, though I saw that in person and it was  actually a series of pages taped together into one scroll! See left.) Each e-book reader simulates pages that you can flip through, but of course those pages and their numbers change when you fiddle with the font size or switch from one device to another. So the job of the e-book formatter is to forget about standard page layouts, including margins, headers, and page numbers, and focus on the overall look and style of the text and chapter titles. The most important formatting commands you’ll issue are those telling the conversion software when there should be breaks in the scrolling for new chapters and sections.
One of the handiest features of an e-book is the hyperlinked table of contents that allows the reader to jump to sections and chapters, much more efficient than an imprecise thumb cracking open a book or fanning pages. Creating the hyperlinks was the scariest thing to anticipate but turned out to be the easiest part of e-book formatting. I felt like I’d been let in on a magician’s secret!
I was introduced to e-book formatting last year when I bought a “2Way” template from Book Design Templates online. My goal was to create an attractive internal book design for a very limited print edition that I planned to produce with our local Espresso Book Machine. It was a bonus for me, or so I thought, to be able to make an e-book version at the same time. But it turned out only to be a distraction as I had to disable some of the e-book features for the print version and kept stumbling over the template’s built-in formatting. I did ultimately produce a beautiful print book, but I never could get an acceptable e-book version, partly because of my own ignorance but also because of the conversion program recommended by Book Design Templates. I’m not discouraging anyone from using their templates—they’re good-looking, affordable, and relatively easy to use—but I believe you have better control if you do it yourself from scratch.
So, this past fall, I started all over again with the e-book formatting. I had made quite a few changes to my original Word manuscript and my templates were out of date, so I decided to simply reformat the original. I had chosen Smashwords for my e-book conversion and distribution, and they prefer that you submit a Word document (.doc not .docx!), so at least I was staying within the same program. And their Smashwords Style Guide is so clear and easy to follow that I knew I could do it myself.
A word about hiring a professional designer/formatter: Many people who aren’t as stubbornly DIY as I am will smartly opt for this. Apparently professionals can format an entire e-book (particularly a text-only novel) in a couple of hours, and they only charge somewhere between $100 and $200. So why not!? Because, in my case, I have experience with layout, I enjoy technical challenges, I’m a terrible delegator, and I felt very protective of my photographs and how they displayed. But I can tell you that it took me about six weeks longer than two hours to accomplish! The learning curve was steep and the details endless (not to mention the temptation to keep editing as I was handling the text!). And yet I can still say that it was a lot of fun. (My IT husband/advisor may disagree.)
I won’t be going step by step through the formatting process—I’d end up reproducing the Smashwords Style Guide in order to cover everything, and you can check that out yourself. Instead I’ll hit a few high points. The Smashwords Holy Grail is an uploaded document that’s formatted as simply and elegantly as possible, with no ambiguous commands and using Word’s “paragraph styles” to precisely define the look and flow of the book. If you have any bad habits left over from the typewriter era—tabs, spacing over, multiple returns—they must be shed once and for all during this process!
My manuscript was double-spaced and in a font I found attractive and readable onscreen. It had margins, headers, page numbers, and a few stylistic special situations like letters, postcards, and poems, as well as quite a bit of italicized text where I’d used French words and phrases. I had to dispense with all of that and completely start over, defining and setting new styles. But I wasn’t willing to do the “nuclear method” that Smashwords recommends, where you clear the formatting of the entire document. Sheer terror at the prospect of 600+ pages of undifferentiated text and spacing caused me to take a hybrid approach—starting a completely new document, defining all my styles at the outset, then moving the text over chapter by chapter. (The title page, copyright page, dedication, and table of contents I typed directly into the new document.)
I defined 11 styles, perhaps a few more than I needed, but I wanted to be on the safe side! The names of my styles give you an idea of their usage: Novel Text (90% of the book), Centered Text, Chapter #, Chapter Title, Datelines, First Line Chapter, Letters, Poems & ToC, Postcard, Section Head, and Title Page. For some reason that I can’t reconstruct, I used Times for all these styles instead of the Times New Roman that Smashwords recommended, but it worked. The important thing is that you use the most basic font possible to ensure a good “translation.” (Of course readers can change the font to their liking once they have it on their devices.)
With my original document and my e-book document both open side by side on my iMac, I tackled each chapter: a) setting up each chapter first page with titles and photographs, b) clearing the formatting in the original, c) copying and pasting the chapter text into the new document, d) restoring the formatting of the original document for reference, e) applying styles to the text in the new document. The Find (Command F) option was invaluable, particularly when I was searching for every instance of italics. It’s also important to have the “Show nonprinting characters” function on (the little blue pilcrows, etc.) so you can monitor every single line return, space, and page break. Here’s a screenshot of what my computer screen looked like as I was reformatting:
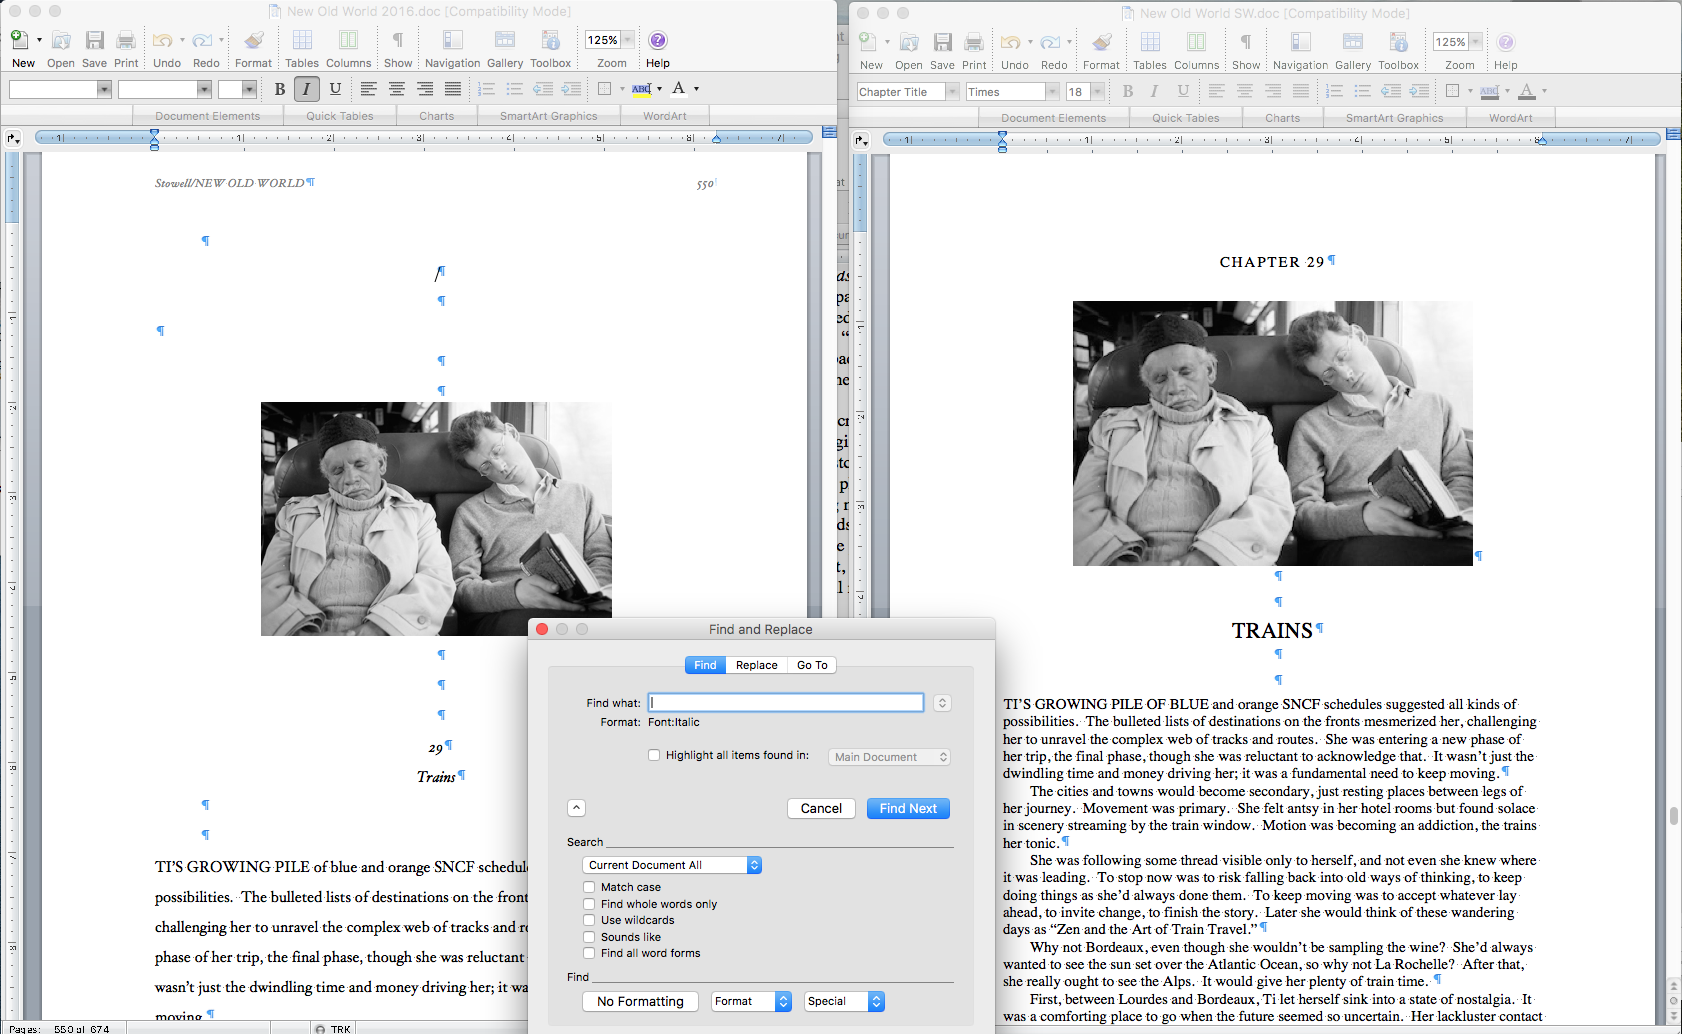
The original manuscript is to the left, with its page numbers and headers, and rather disorganized line returns, and the new formatting on the right, with cleaner chapter heads and more precise commands and some spacing built into the styles. The Find window shows that I’m searching not for specific words but for anything in italics, which would include my French, my postcards, and my letters.
Note that the e-book document is single-spaced, which turns out differently on different e-readers. For instance, the Kindle version has tighter line spacing, which in my opinion looks clunkier than the iBooks version. The screenshots below are from my iPad—Kindle at left, iBooks to right. You can also see that the Meatgrinder (the Smashwords conversion program) has taken care of the justification of text…though I learned while collecting these various screenshots that the iBooks version on the iPhone is not justified—perhaps a readability issue for such short lines (see iPhone shots further down).


Probably the trickiest part of formatting an e-book is getting photographs and other graphics to display properly. You don’t have absolute control over how big they’ll show up, and each format deals with images differently. All you can do is make sure your photos are small enough not to put your document over the maximum upload size (10 MB for Smashwords) but big enough to be sharp and to approximate the look you want. I made all my photographs 320 pixels wide so they wouldn’t take up the whole screen width but also wouldn’t appear as postage stamps. When you figure in the differences among smart phone, tablet, and computer displays, you can see that it’s a hit-or-miss proposition. (Compare the iPhone images below, Kindle at left, iBooks at right, with the iPad screenshots above.) If anyone has any tips for keeping photos in relative proportion to the text, please share!


As for the hyperlinked Table of Contents, I was delighted to discover how easy it was. In a nutshell, you insert a bookmark before your chapter title, give it a unique one-word name, then go back to the ToC you’ve already typed, highlight the equivalent chapter, go to Insert—Hyperlink, and anchor it to the bookmark. And that’s it! There can be glitches along the way, and I had a couple, but Smashwords helped resolve them.
Throughout the formatting, I did a number of test conversions using a program that Book Design Templates introduced me to. It’s called Calibre, and it converts books into a host of digital formats. But I’ve learned that each converter has its quirks—for instance, Calibre can’t justify the text in an EPUB format to save its life, and the Meatgrinder at Smashwords has an odd habit of inserting blank pages between page breaks. Another bit of awkwardness is that Calibre only accepts .docx from Word while the Meatgrinder wants .doc, so I was constantly having to save in different versions for testing. But these trial runs with each converter gave me the general idea whether things were working, particularly with the hyperlinks and the photos. And when I had problems I just couldn’t puzzle out, a very kind and smart guy named Kevin at the Smashwords help desk looked at my document to see where the errors were, and/or ran my document through the Meatgrinder on a test basis. That way, before I officially uploaded it on “publishing day,” I knew that my document was clean and I was confident it would survive their “AutoVetter,” which identifies formatting errors.
I can’t say enough about how helpful Smashwords was during the formatting. Since I wasn’t paying them upfront, I didn’t expect to have access to a help desk, much less someone like Kevin who could quickly diagnose my issues and test my fixes. But I’m not sure he or anyone else would have been as willing to help if I hadn’t demonstrated some proficiency in Word or familiarity with the Smashwords guidelines. Fair warning: this process is not for the unprepared or the faint of heart!
As I’ve said before, I’m a bit of a perfectionist, and it was hard while formatting my e-book to let go of some of the control I had when designing my print book. But it’s important to realize that the Meatgrinder at Smashwords is a generalist, having to come up with a product that works for the range of e-readers available, from iPads to iPhones to Kindles to Nooks. Kevin said that the Meatgrinder would be undergoing an upgrade soon to eliminate some of its idiosyncrasies, but in the meantime I think it did a remarkable job of turning my Word doc into a presentable, sometimes even attractive, e-book.
Calibre can justify e-books just fine. Use the Convert function, then go to “Look and feel”, and in the second tab (Text), change “Text justification” to “Justify text”.